
Edible Paint
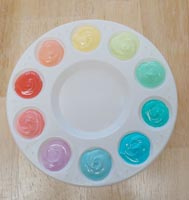
The beautiful natural coloration of foods is always best, but you can also accent a bento with edible “paint”. I use it from time to time. The paints in the palette above are made from sour cream, which is just one option. Read on for some pointers on painting with foods and what to expect from the different types you’re working with.
Most of my painting is done with sour cream, yogurt, vanilla pudding and cream cheese. They take on color well and mix fairly smoothly, but each one has its pros and cons.
Yogurt/Sour Cream
Pros: Smooth, thin, bright color, easy to tailor to your dietary needs.
Cons: Has a nasty habit of separating and becoming watery.
Vanilla Pudding
Pros: Smooth, bright color, comes in regular, fat-free and sugar-free, easy to mix right in the cup.
Cons: Turkey or cheese painted with vanilla pudding can taste a bit weird.
Cream Cheese
Pros: Bright color, sticks where you put it, mixes well with the flavors of lots of foods.
Cons: Slightly rougher texture, more difficult to paint with.
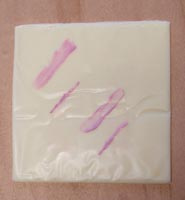
I’ve made some streaks of “paint” on a piece of American cheese for comparison. On the left are a brush-stripe and a toothpick-stripe made with cream cheese. The stripes on the right are made with sour cream. Do you see the difference in brightness and texture? This is why I prefer to use the cream cheese most of the time.
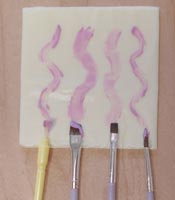
Brush types make a big difference, too. All of these wiggly shapes are made with food-safe cake decorating brushes in cream cheese. Like regular paintbrushes, quality makes a big difference. The yellow craft-store brush makes a patchy line; the three specialized fondant brushes on the right are more consistent. Always make sure to handwash your brushes well after painting with food, by the way…you don’t want to introduce bacteria into your next project!
Also keep in mind that the substance you’re using as paint must vaguely match what you’re painting on, or else it could melt away. Use fat-based paints like sour cream and cream cheese on similar solids, like sliced cheese. I’ve found that cheese-on-cheese painting seems to produce the brightest and longest-lasting results.
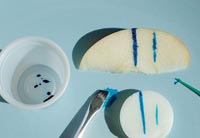
For watery foods, it’s best to use your food coloring (natural juice or manufactured) as a sort of watercolor. Here I’ve made lines on an apple (above) and an egg (below) so you can see how straight-painted food coloring behaves. For lighter color, dilute with water. Remember that the brighter the color of straight-painted food coloring, the bigger the risk you run of coming away from lunch with a blue mouth.
You can see paint work on an apple on the sides of my tree frog bento. Watery foods will tend to feather and soften their color over time, so you might find that the boldly-drawn lines on your hard-boiled egg have been absorbed and are showing through as gentle pastels. That’s just the way egg behaves.
 Here’s my black food coloring in his lonely little isolation tank. Black food coloring can be beautiful and very useful, but I tend to treat the stuff like a level 4 biohazard. It stains everything it touches and a little goes a long, long way. I open the bottle with paper towels and deal with a drop or two at a time in a small dish. When I’m finished, the bottle gets closed with paper towels and goes back into the box-within-a-box. If you’ve ever had a bottle of black food coloring spill in your cupboard, you know why. Squid ink is healthier, yes, but I’m allergic to it, so I’ve had to come to terms with this stuff.
Anyway, back to painting. I’m going to do a quick cheese-on-cheese painting here (cream cheese paint on a piece of American cheese) to show you how well it performs. I cut the American cheese into a t-shirt…let’s tie-dye it.
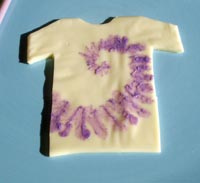
Using one of the nicer fondant brushes (the squared one), I picked up a little purple cream cheese and made a spiral by gently daubing the “paint” onto the American cheese. Daub, daub, daub, around and around. Once I finished with the purple, I picked up a bit of pink, and so on. Just follow the spiral around and overlap the colors slightly to make it look more authentic.
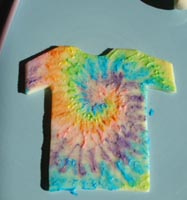
Here’s the finished product. Cover and stick in the fridge for a few minutes (I kept the plastic off the surface by surrounding the cheese with big-handled paring knives). Pry it gently off the plate (don’t worry too much about little cracks, you can hide them) and lay it on your COOLED bento (hot rice will make the shirt go bye-bye very quickly).
See? Not that hard, just a little time-consuming.
Ok, that’s all for me! Thanks for hanging out with me this week. ![]()
Welcome back, Biggie, we all missed you!
FURTHER READING:


